

Outdoor lighting can transform your home’s exterior into a welcoming and well-lit haven. Whether you’re looking to enhance security, highlight architectural features, or simply create a cozy ambiance, this guide will walk you through how to design and install outdoor lighting effectively.
Planning Your Outdoor Lighting Design
Creating a comprehensive outdoor lighting plan involves assessing your space, choosing the right fixtures, and deciding on the best power sources. This section will guide you through these initial steps to ensure your lighting project enhances your home’s beauty and functionality.
Assessing Your Outdoor Space
Understanding the layout of your yard and the elements you want to accentuate is the first step in creating an effective lighting plan. Consider the following:
- Identify Key Features: Focus on trees, water features, or architectural elements that can enhance your outdoor space when illuminated.
- Evaluate Safety Needs: Determine areas that need brighter lights for security to deter potential intruders or to ensure safe walkways.
- Consider Usability: Think about how areas are used, such as garden paths or patios, to ensure they are functional after dark.
Choosing the Right Light Fixtures
The choice of fixtures significantly impacts the aesthetics and efficiency of your outdoor lighting. Consider the following fixture types:
- Path Lights: Best for illuminating driveways, walkways, and garden paths, providing safety and visual appeal.
- Flood Lights: Ideal for brightening large areas; perfect for security and highlighting significant features like facades.
- Spotlights: Use these to focus light on specific elements, such as statues or trees, creating dramatic effects.
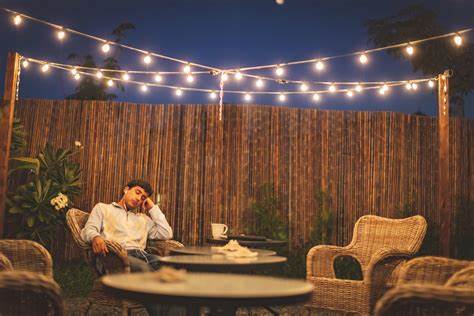
- String Lights: Offer a soft light that enhances the ambiance of outdoor living spaces, ideal for entertaining or relaxation.
Deciding on Power Sources
The longevity and efficiency of your outdoor lighting depend heavily on the chosen power sources. Here are common options:
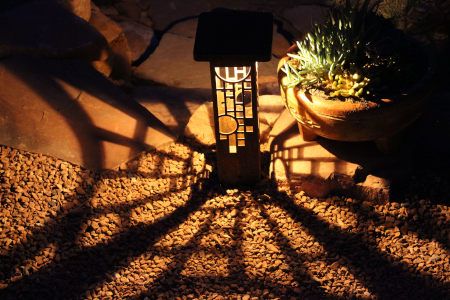
- Solar Powered Lights: These are energy-efficient and easy to install but depend on sufficient sunlight to operate effectively.
- Hardwired Electric Options: Offer a more reliable power source and can support a larger number of lights or higher wattage fixtures.
- Battery-Operated Lights: Useful for areas without easy access to power outlets, though they require regular battery changes.
By considering these elements carefully and planning your outdoor lighting with precision, you can enhance your home’s safety, functionality, and aesthetic appeal. This strategic approach ensures that every light serves a purpose, whether it’s lighting a dark corner, enhancing evening ambiance, or highlighting your home’s best architectural features.
Design Techniques for Outdoor Lighting
Effective outdoor lighting design blends function and style, enhancing the safety and beauty of your outdoor space. This section explores various techniques to help you maximize the impact of your outdoor lighting, from illuminating landscape elements to accentuating architectural features and creating inviting ambiances.
Landscape Lighting Design
Landscape lighting can transform your garden into a nighttime oasis, providing both aesthetics and safety. Here’s how you can enhance your garden paths and trees:
- Identify Focal Points: Choose trees or features like water elements that will serve as the main points of interest.
- Use LED Lights: Opt for LED lights for their energy efficiency and longevity. Position them to uplift trees or wash walls with light.
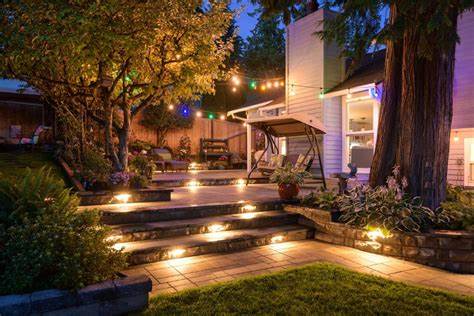
- Path Lighting: Install path lights along garden paths to ensure visibility and add a decorative touch. The best placement is usually along one side of the path, staggered for even lighting.
- Consider Layering: Combine spotlights and softer wash lights to add depth and texture to your landscape.
- Electrical Planning: Ensure all lighting fixtures are connected via safe wiring methods like the hub method, which helps reduce voltage drop across long distances.
Highlighting Architectural Features
Accentuating the architectural elements of your home can increase curb appeal and create dramatic nighttime aesthetics. Here are some tips:
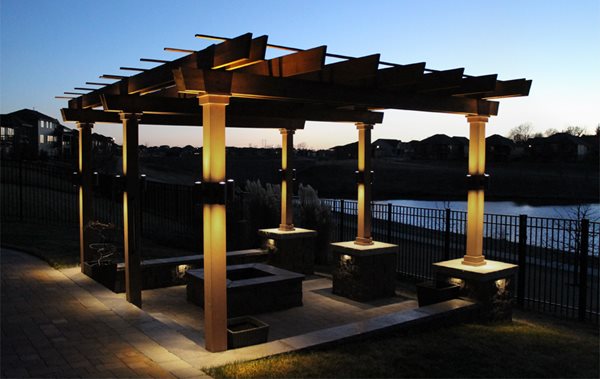
- Choose the Right Fixtures: Spotlights and floodlights are ideal for emphasizing features such as columns or dramatic archways.
- Positioning: Place lights strategically to either directly or indirectly illuminate exterior architectural features, depending on the desired effect.
- Wiring Considerations: Use a combination of daisy chain and T-method wiring for easier installation and better reliability. Ensure that all connections are secure and use underground feeder cables for fixtures far from the house.
- Work with Professionals: For complex installations, especially when dealing with high-wattage lights or extensive architectural features, consider hiring a licensed electrician.
Creating Ambiance with Soft Light
Soft lighting can create a warm, inviting atmosphere in your outdoor living spaces. Implement these strategies to achieve the perfect ambiance:
- String Lights: Install string lights overhead in seating areas or along fences for a festive, casual look.
- LED and Halogen Options: Use a mix of LED lights for efficiency and halogen lights for warmer tones.
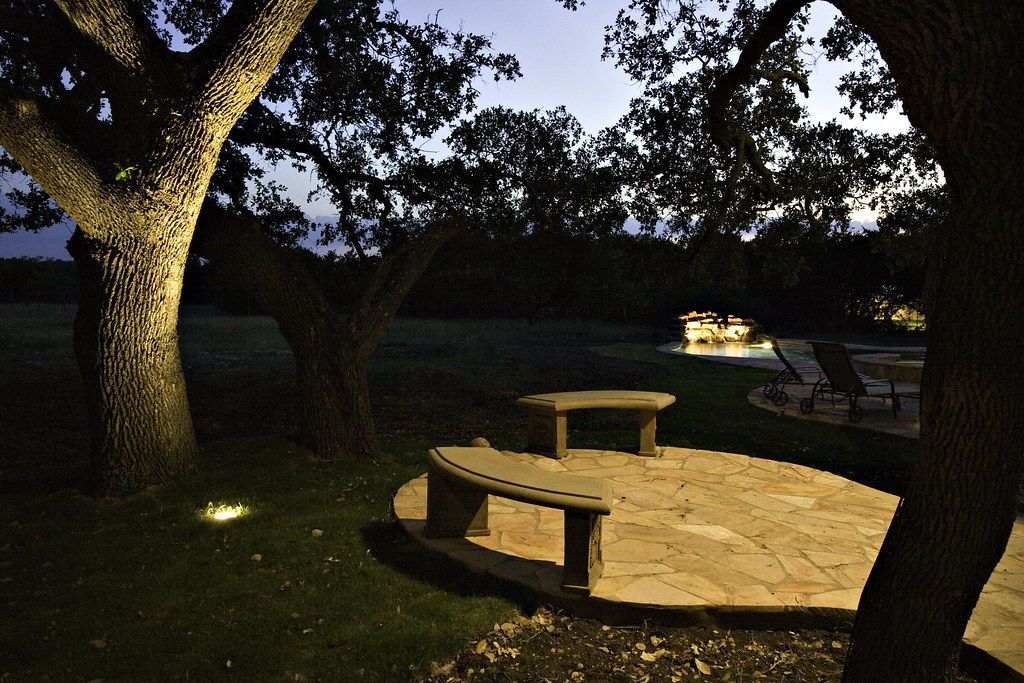
- Indirect Lighting: Place fixtures behind plants or decor elements to cast a soft glow without harsh direct light.
- Voltage and Safety: Maintain a safer voltage level by using transformers that match your lighting system’s capacity. Always check for weather conditions that might influence your installation choices.
- Soft Light Placement: Consider the best placement for achieving soft light effects, such as under benches or inside landscaping features like bushes or small trees, using ground lights.
By carefully planning each aspect of your outdoor lighting—from the practical layout of cables and wiring to the aesthetic placement of each fixture—you can enhance both the functionality and beauty of your outdoor environment.
Preparing for Installation

Proper preparation is key to the success of your outdoor lighting project. This section guides you through understanding different wiring methods, calculating necessary power specifications, and planning the physical layout of your installation to ensure efficiency and safety.
Understanding Wiring Methods
Familiarizing yourself with various wiring techniques is crucial for a successful outdoor lighting setup. Here are some common methods:
- Daisy Chain Method: This involves connecting all light fixtures in a sequence from a single power source. While simple, it can lead to a voltage drop if the chain is too long.
- Hub Method: Fixtures are wired back to a central hub or transformer, reducing the risk of voltage drop and allowing for more uniform brightness across all lights. This method helps maintain consistent lumen output throughout the system, ensuring that each fixture delivers its intended light intensity regardless of its distance from the power source.
- Combination Method: For complex layouts, combining both daisy chain and hub methods can optimize lighting across different areas and features.
Each wiring method has its advantages and considerations, such as the total wattage it can support and the complexity of the installation process. Choose the method that best fits the scale and design of your outdoor lighting project.
Calculating Total Wattage and Transformer Capacity
To ensure your outdoor lighting system operates efficiently and safely, it’s crucial to perform essential calculations starting with the total wattage. Sum up the wattage of all light fixtures you plan to install to determine how powerful your transformer needs to be. Select a transformer that can handle slightly more than your calculated total wattage; this prevents overloading and offers flexibility for future additions to your lighting setup.
Also, make sure the wires you use can handle the load and that the voltage across your system remains stable. This step helps prevent dimming and potential hazards, ensuring your lighting system’s longevity and performance. The choice between warm white and cool white lights can dramatically affect the mood and functionality of your outdoor space, so it’s worth factoring this into your overall lighting design.
Marking the Cable Route
Before beginning the physical installation, it’s essential to carefully plan and mark where your cables will run. Use spray paint or flags to mark the intended path of your underground wires or cables. This visual guide is crucial to avoiding installation mistakes. Also, plan your cable route to dodge interference with roots, underground utilities, and other potential obstructions.
Contacting utility companies to ensure no existing underground lines are in your intended path is a wise precaution. Aim to choose routes that are not only safe but also maintain the aesthetic appeal of your garden or outdoor area. Opting for hidden or discreet cable routes often yields the best visual results.
Installing Outdoor Lighting Fixtures

Successfully installing outdoor lighting fixtures for commercial and residential property involves careful planning and precise execution. This section provides detailed steps for setting up electrical wiring, securing light fixtures, and connecting them to a power source. By following these guidelines, you can ensure a safe and efficient installation that enhances your outdoor space.
Step 1: Setting Up the Electrical Wiring
The initial step in installing outdoor lighting is laying out and connecting the electrical wiring. Here’s how to do it safely and efficiently:
- Plan the Wire Runs: Before digging, use careful planning to determine the most effective route for your wire runs. This can include avoiding high-traffic areas and ensuring the wires are protected from potential damage.
- Dig a Shallow Trench: For underground cables, dig a shallow trench about 6 inches deep. This will help protect the wires from external elements and reduce the risk of accidental damage.
- Lay the Cables: Place the cables needed for your lighting in the trench. Ensure that you use outdoor-rated wire that can withstand weather conditions.
- Make Proper Connections: Use wire strippers to prepare the ends of your wires and ensure connections are tight and secure. Employing connectors specifically designed for outdoor use can help prevent corrosion and ensure longevity.
- Test Your Wiring: Before covering the trench, test the wiring to ensure all connections are working correctly and that there are no issues with the electrical current.
Step 2: Installing the Light Fixtures
Once your wiring is in place, the next step is to install the light fixtures themselves:
- Choose Fixtures: Pick outdoor lighting fixtures that are suitable for the environment and meet your aesthetic and functional needs. Consider factors like material, durability, and light output.
- Prepare the Installation Site: Depending on the location, prepare the site by drilling holes or setting up mounts. For ground fixtures, such as path lights, ensure the ground is firm enough to hold the fixture upright.
- Secure the Fixtures: Attach each fixture securely, whether mounted on a wall, hung from a structure, or planted in the ground. Use hardware that is suitable for outdoor conditions to prevent rusting or degradation.
- Align for Optimal Illumination: Position each fixture to optimize lighting effects, ensuring pathways are clearly lit and architectural features are highlighted effectively.
Step 3: Connecting to a Power Source
The final step is connecting your fixtures to a power source, which could be a solar panel, batteries, or your home’s electrical system:
- Solar Panels: For solar-powered lights, position the panels where they will receive maximum sunlight and connect them to the fixtures using manufacturer-provided cables and connectors.
- Battery Systems: If using battery-operated fixtures, ensure the batteries are charged and properly installed. Regular maintenance will be required to keep the lights operational.
- Home Electrical System: For fixtures connected to your home’s electrical system, it’s often best to work with a licensed electrician to ensure safe and correct connections. This includes integrating the system with existing outdoor electrical outlets and ensuring that the transformer’s capacity suits your installation.
By carefully executing each of these steps, you can effectively install your outdoor lighting fixtures, enhancing both the safety and the ambiance of your outdoor areas.
Finalizing Your Outdoor Lighting Project
The final phase of your outdoor lighting project transforms your vision into reality. As dusk settles, your garden path comes alive with strategically placed light fixtures, creating a captivating nocturnal landscape. This stage is crucial for perfecting the ambiance and ensuring functionality.
Adjusting Lights for Desired Effect
Fine-tune your outdoor lights to achieve the perfect illumination. Experiment with the angles and heights of landscape lights to create depth and interest. The position of each lighting fixture can vary depending on your desired effect, whether it’s highlighting exterior architectural features or softly illuminating garden beds.
Testing and Troubleshooting
Thoroughly test your system to identify and resolve issues. Check for voltage drops, especially in areas far from the outdoor electrical outlet. Inspect each fixture for secure connections and proper sealing. Ensure your transformer is correctly calibrated for low-voltage systems. This process helps maintain consistent illumination across your outdoor space.
Consulting a Licensed Electrician
For complex setups or persistent issues, don’t hesitate to call a professional. A licensed electrician can tackle intricate wiring situations, ensure code compliance, and optimize your system’s performance. They’re invaluable for installing additional outdoor outlets or integrating sophisticated control systems, elevating your lighting design beyond the basics.
The Lasting Impact of Your Outdoor Lighting Journey
Your outdoor lighting project is more than just an installation; it’s a transformation of your living space. Each light fixture and outdoor outlet you’ve placed contributes to a functional, beautiful nightscape that extends your home’s warmth into the outdoors. This journey has not only enhanced your property’s appeal but also equipped you with valuable skills for future projects.
Remember, the beauty of outdoor lighting lies in its adaptability. As your needs change, so can your design. Don’t hesitate to revisit and refine your lighting scheme, or to consult a leading provider of outdoor lighting solutions for more complex additions or troubleshooting.